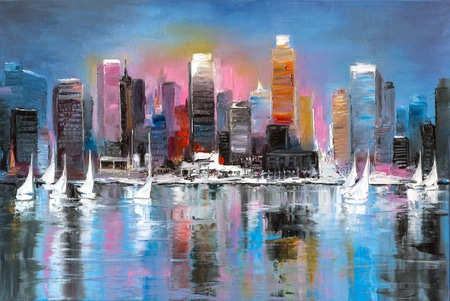
More than ever, art is being touted as one of the most effective and healing ways to express one’s creativity and emotions.
 Over time, artists’ works have told the stories of the generations in which they lived in. And oil paintings are some of the most well-known and coveted masterpieces in history.
Painting with oils gives art a certain kind of life that speaks to art lovers and aficionados.
Many modern-day artists and beginners crave the experience of working with oil paints.
Beginners often start off using watercolors, which can be much more forgiving and abstract enough for inexperienced painters to alter and correct.
Painting with oils, however, is a much different story, and requires learning a few timeless skills.
Ready to get started?
Here’s our guide: Oil Painting for Beginners
Choose your surface
Begin by choosing a paint surface that’s specifically made for oil paints.
There are a multitude of canvases, but the two best options for beginners are stretched canvas panels and canvas boards.
Although they are often a more expensive linen, canvases are best. Ask your local store clerk for help!
Choose your brushes
 You should gather a wide range of brush sizes before you dive in.
Be sure they’re suited for oil painting (hog hair and most synthetic brushes will do the trick).
And why not add a palette knife to the mix? Used to mix colors as well as to create larger planes of paint on your canvas, a palette knife can help you add life and texture to your painting—when you’re ready!
Learn the “fat over lean” rule
For successful oil paintings, you must follow the “fat over lean” rule.
It simply means that the oil paints you begin with should be thinner that the subsequent coats. With each coat, the paint should contain more oil than the coats used in the beginning.
We follow this rule so that our initial layers dry faster than our top layers—if vice versa, our top layers will crack.
To accomplish the “fat over lean” method of painting with oils, the first coats of paint must be diluted, and an odorless paint solvent is recommended.
Now it’s time to start oil painting!
Here are the seamless steps to take if you’re just getting started with oils.
Step 1: Getting started
Make sure that the room in which you are painting in has good ventilation because even though your solvent may be odorless, it is still evaporating into the air.
The first coat of paint should be diluted until it becomes like a watercolor.
Step 2: The first coat
Begin to use the first coat of diluted oil paints with a stiff paint brush.
Fill in the areas of the canvas you’d like to paint—the size of the brush should correlate with the area of the canvas being painted.
Pro Tip: Using a few different brushes for painting with oils is best. If you can, having one brush for each paint color is recommended.

Step 3: Onto the next coat!
Your next coat of paint should be mixed with less solvent than the primary coat.
At this time, you will begin to cover the first coat of paint and begin a process called modeling.
Oil paint modeling is the process of addressing your transition areas, defining some of the edges while softening others.
Step 4: Start adding details
Allow this coat to dry thoroughly because your next coat of paint will be used without any solvent.
With this oilier and richer coat of paint, you will begin to accentuate certain areas of the canvas.
This step is often the longest part of the process, taking up to 2-3 hours to complete. In this process you are defining the lighter aspects of your painting, as well as your shadows.
Step 5: Place the finishing touches
The finishing coats of your oil painting should be mixed with a painting medium like linseed or stand oil for an even oilier, richer texture and unique finish.
Since the last coats of paints will be thicker, they will take longer to dry.
You can speed up the drying process by adding a bit of liquin, which is a synthetic resin that helps paint to dry faster.
You can try these measurements for the best results:
- One part of the mixture should be composed of ½ solvent, ½ linseed oil
- The remaining part should be liquin or a similar product
- Shake the mixture until every part is thoroughly incorporated.
- You are now ready to apply your final coats using this mixture.
Oil Painting for Beginners at Hunakai Studio
Art is owning your personal and unique expression.
If you are a beginner, remember to have fun and don’t be afraid to experiment!
At Hunakai Studio, we aim to teach others how to open their minds and use art as an outlet. And oil painting is just one way to achieve this.
We offer adult oil painting classes (two- and three-hour) as well as an exciting class in oil portraits.
Call us at 508-543-5665 today to register for one of our classes!
